Getting Started Guides
Gravio Rental Devices Setup
Zigbee Devices and Sensors
Temperature Sensor
Monitor and measure temperature in real-time.
Learn how to set up
Door and Window Sensor
Detect if a door or window is open or close in real-time.
Learn how to set up
Motion Sensor
Detect movement at a distance.
Learn how to set up
Wireless Mini Button
Control or trigger connected devices or programs wirelessly.
Learn how to set up
Vibration Sensor
Detect movement and vibration of objects.
Learn how to set up
Wireless Double Button
Control or trigger connected devices or programs wirelessly.
Learn how to set up
Gravio CO2
Detect CO2 concentration.
Learn how to set up
Gravio Light
Change the color of this wireless LED light using Gravio to indicate events or statuses.
Learn how to set up
Gravio Distance
Measure or monitor the distance between the sensor and object.
Learn how to set up
Gravio LED Matrix
16x16 colorful display with Zigbee remote access.
Learn how to set up
Temperature Sensor

Product introduction

The Aqara temperature and humidity sensor sends indoor temperature, humidity, atmospheric pressure in real time to Gravio.

Note: This product is for indoor use only.

Quick Setup

  1. Insert the Gravio receiver in the USB port of your PC or Mac, then start the Gravio Edge Server.
  2. Remove the sensor's battery insulation seal.
  3. Start Gravio Studio on your PC, iPhone or iPad, tap to select Gravio Server which you just started, and create areas to describe where the Sensors are and layers to group them by function. Please select "Aqara-Temperature" from the layer selection list.
  4. Connect the Graivo receiver to this layer.
  5. From the Gravio Studio device list, tap the gravio Receiver line.
  6. If this sensor is the first to be connected sensor, press "Reset". (Please do not reset your receiver before adding subsequent sensors.)
  7. Next, press the "Pairing" button.
  8. When pairing is in progress, you will see a count-down. During that count-down, press the button on the sensor once.
  9. When the sensor connected to Gravio Studio screen is displayed, connection is completed.

Note: If the connection fails, please move the accessory closer to the Gravio Receiver and try again.

Installation

Option 1: Place it directly in the desired position.

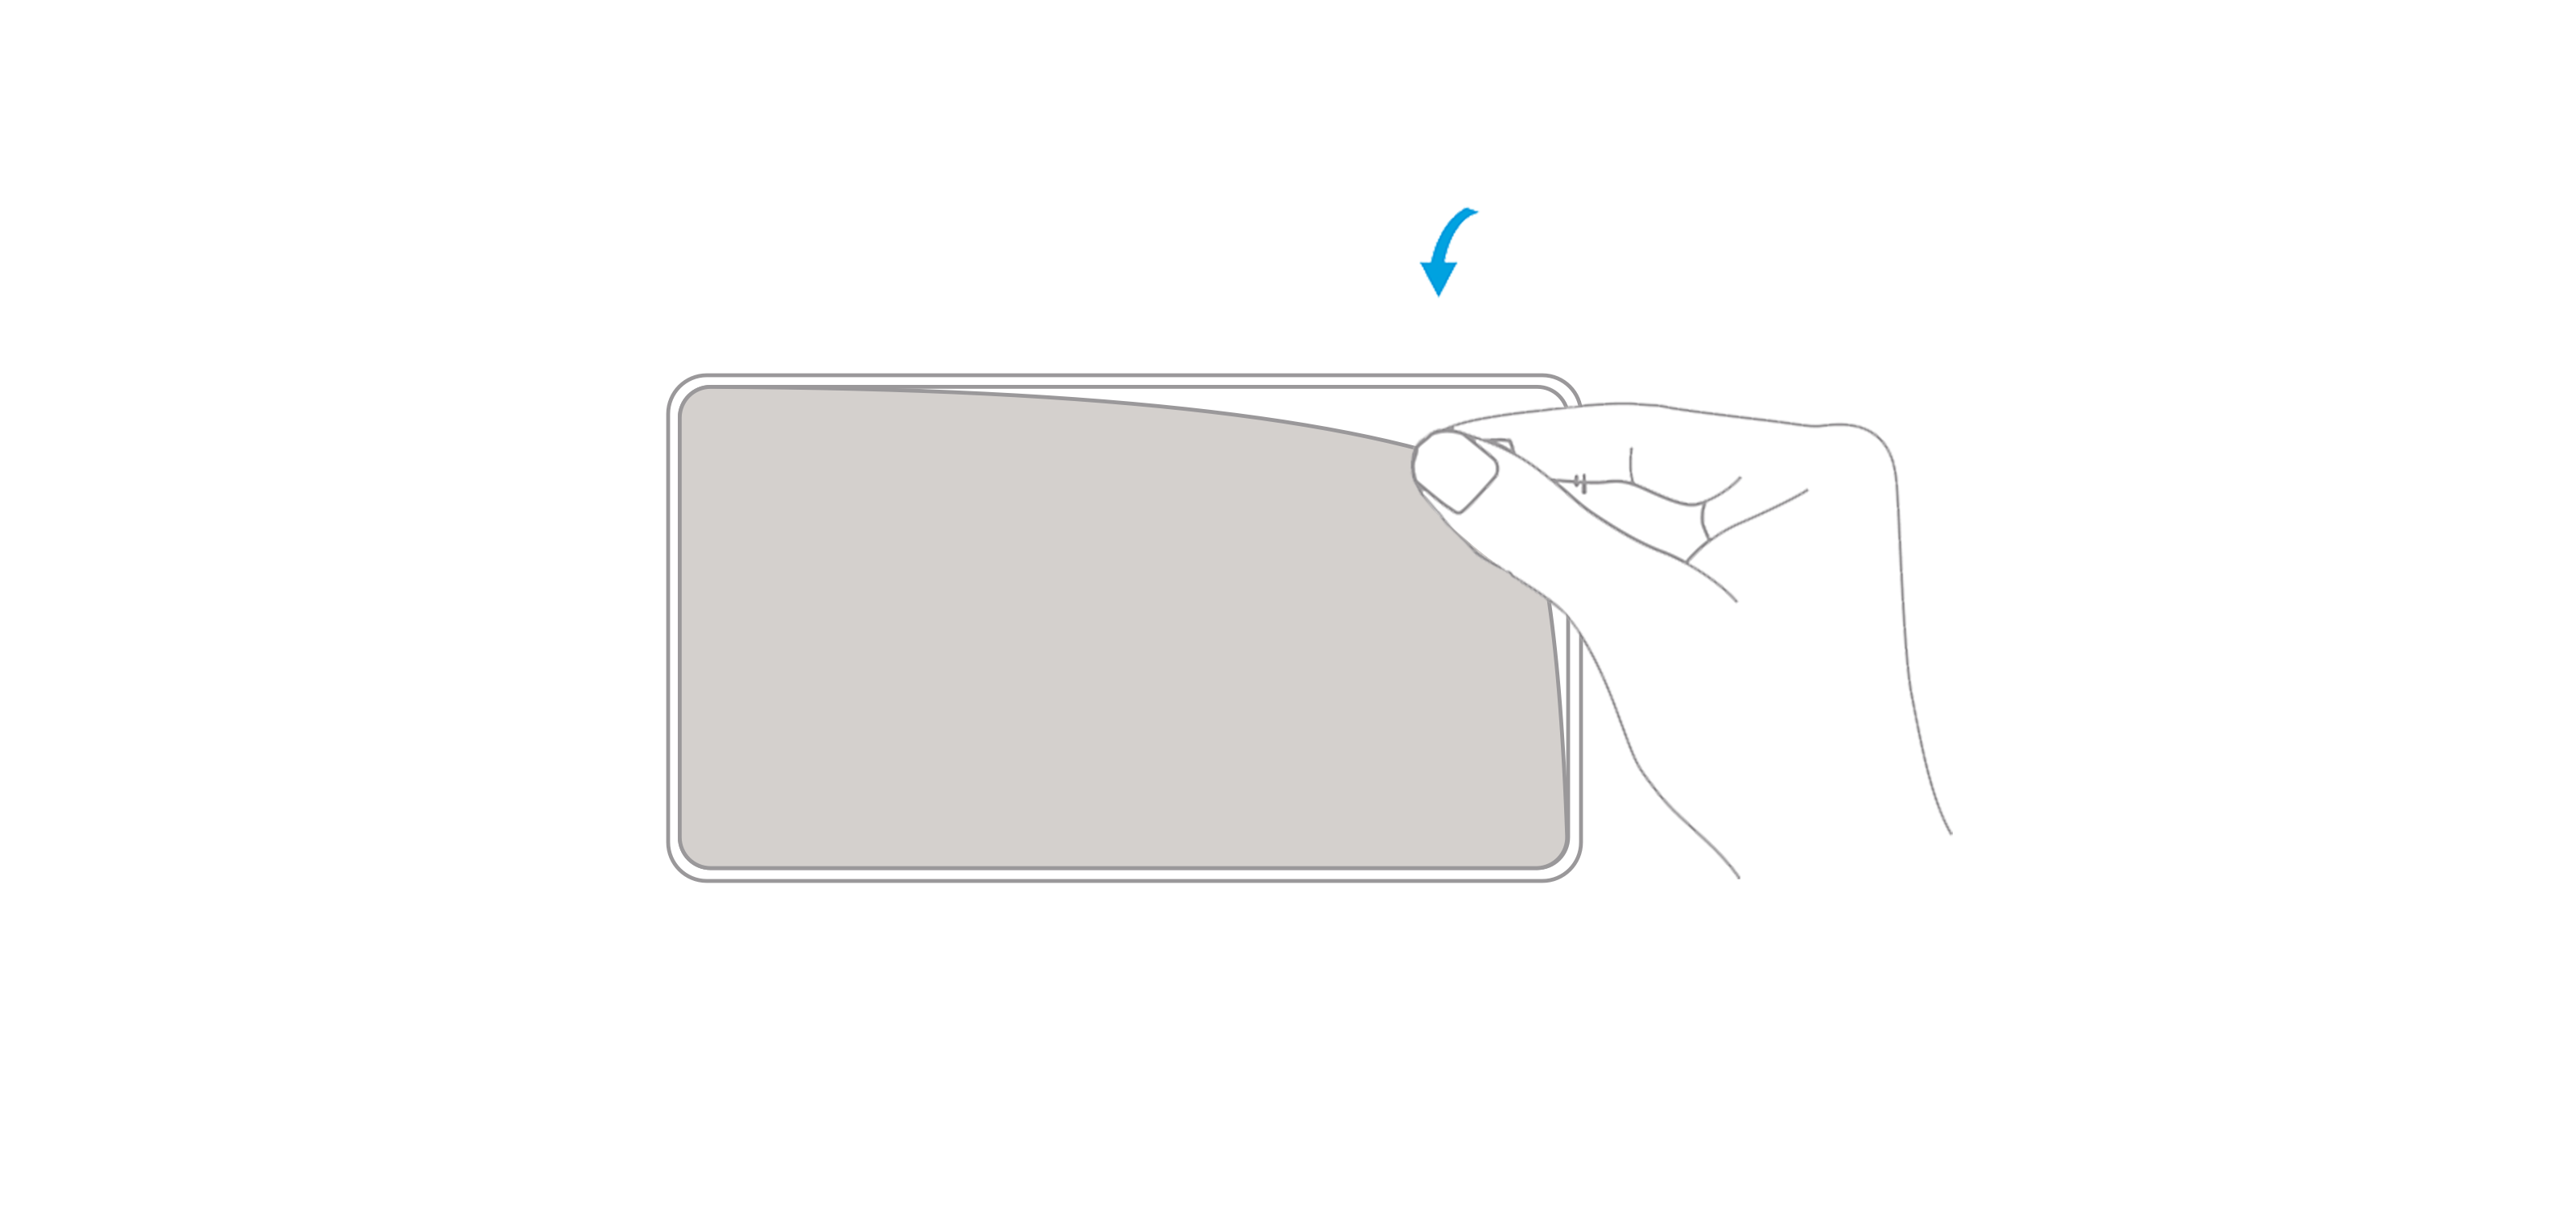
Option 2 : Remove the protective film, and stick it to the desired position.

Note: Keep the surface clean and dry.

Specifications

  1. Model: WSDCGQ11LM
  2. Dimensions: 36 × 36 × 9 mm (1.42 × 1.42 × 0.35 in. )
  3. Wireless Protocol: Zigbee
  4. Battery: CR2032
  5. Temperature Range and Precision: -20°~ +50° C, ± 0.3° C
  6. Humidity Range and Precision: 0~100% RH, ± 3%
  7. Atmospheric Pressure Range and Precision: 30 kPa ~ 110 kPa, ± 0.12 kPa
  8. Operating Humidity: 0~95% RH, no condensation
Door and Windows Sensor

Product Introduction

The Aqara door/window opening and closing sensor examines the opening and closing state of a door or a window. If the the sensor unit comes close to the magnet, the repective state is sent to the Gravio Edge Server where appropriate Gravio Actions can be triggered in response.

Note: This product is for indoor use only.

Quick Setup

  1. Insert the Gravio receiver in the USB port of your PC or Mac, then start the Gravio Edge Server.
  2. Remove the sensor's battery insulation seal.
  3. Start Gravio Studio on your PC, iPhone or iPad, tap to select Gravio Server which you just started, and create areas to describe where the Sensors are and layers to group them by function. Please select "Aqara-Door" from the layer selection list.
  4. Connect the Graivo receiver to this layer.
  5. From the Gravio Studio device list, tap the Gravio Receiver line.
  6. If this sensor is the first to be connected sensor, press "Reset". (Please do not reset your receiver before adding subsequent sensors.)
  7. Next, press the "Pairing" button in Gravio Studio.
  8. When pairing is in progress, you will see a count-down. During that count-down, press the button on the sensor once.
  9. When the sensor connected to Gravio Studio screen is displayed, connection is completed.

Note: If the connection fails, please move the accessory closer to the Gravio Receiver and try again.

Installation

Step 1: Remove the protective film.

Step 2: Align the marker line on the sensor unit and the magnet.

Step 3: Stick magnet and sensor device to doors or windows (It is recommended to install the sensor unit on the immovable surface, and the magnet on the moveable surface. Make sure the installation gap is less then 22mm when doorsor windows are closed.)

Specifications

  1. Model: MCCGQ11LM
  2. Dimensions: 41 × 22 × 11 mm (1.61 × 0.87 × 0.43 in. )
  3. Wireless Protocol: Zigbee
  4. Battery: CR1632
  5. Maximum Detection Distance: 22mm
  6. Operating Temperature: -10° ~+50° C
  7. Operating Humidity: 0~95% RH, no condensation
Motion Sensor

Product introduction

Aqara motion sensor detects human motion using infrared rays. By linking with Gravio, you can use it in various scenarios, such as turning the light on/off automatically when activity or human presence is detected.

Note: This product is for indoor use only.

Quick Setup

  1. Insert the Gravio receiver in the USB port of your PC or Mac, then start the Gravio Edge Server.
  2. Remove the sensor's battery insulation seal.
  3. Start Gravio Studio on your PC, iPhone or iPad, tap to select Gravio Server which you just started, and create areas to describe where the Sensors are and layers to group them by function. Please select "Aqara-Occupancy" from the layer selection list.
  4. Connect the Graivo receiver to this layer.
  5. From the Gravio Studio device list, tap the Gravio Receiver line.
  6. If this sensor is the first to be connected sensor, press "Reset". (Please do not reset your receiver before adding subsequent sensors.)
  7. Next, press the "Pairing" button in Gravio Studio.
  8. When pairing is in progress, you will see a count-down. During that count-down, press the button on the sensor once.
  9. When the sensor connected to Gravio Studio screen is displayed, connection is completed.

Note: If the connection fails, please move the accessory closer to the Gravio Receiver and try again.

Installation

Option 1: Place it directly in the desired position.

Option 2 : Remove the protective film, and stick it to the desired position.

Option 3 : Stick the Motion Sensor to the stand, and stick the stand to where you need it.

Notes: Keep the surface clean and dry.

The recommended installation height is 1.2 to 2.1 meter. If the installation height is below 1.2 meter, the detection area will be decreased; if above 2.1meter, the detection area might have blind spots.

Note that the lens should be aligned with the detection area when installing, and place or pasted as close as possible to the edge of a table or cabinet.

Specifications

  1. Model: RTCGQ11LM
  2. Dimensions: 30× 30 × 33 mm (1.18 × 1.18 × 1.30 in. )
  3. Wireless Protocol: Zigbee
  4. Battery: CR2450
  5. Maximum Detection Distance: 7meter
  6. MaximumDetection Angle: 170°
  7. Operating Temperature: -10°~ +45° C
  8. Operating Humidity: 0~95%RH, no condensation
Wireless Mini Button

Product introduction

The Aqara wireless button is a compact design and low power consumption remote control button. You can assign Gravio action to each operation such as press once, press twice, or press and hold.

Note: This product is for indoor use only.

Quick Setup

  1. Insert the Gravio receiver in the USB port of your PC or Mac, then start the Gravio Edge Server.
  2. Remove the sensor's battery insulation seal.
  3. Start Gravio Studio on your PC, iPhone or iPad, tap to select Gravio Server which you just started, and create areas to describe where the Sensors are and layers to group them by function. Please select "Aqara-WirelessSwitch" from the layer selection list.
  4. Connect the Graivo receiver to this layer.
  5. From the Gravio Studio device list, tap the gravio Receiver line.
  6. If this sensor is the first to be connected sensor, press "Reset". (Please do not reset your receiver before adding subsequent sensors.)
  7. Next, press the "Pairing" button.
  8. When pairing is in progress, you will see a count-down. During that count-down, press the button on the sensor once.
  9. When the sensor connected to Gravio Studio screen is displayed, connection is completed.

Note: If the connection fails, please move the accessory closer to the Gravio Receiver and try again.

Installation

Option 1: Place it directly in the desired position.

Option 2 : Remove the protective film, and stick the wireless button to the desired position.

* Keep the surface clean and dry.

Specifications

  1. Model: WXKG11LM
  2. Dimensions: 45 × 45 × 12 mm (1.77 × 1.77 × 0.47 in. )
  3. Wireless Protocol: Zigbee
  4. Battery: CR2032
  5. Operating Temperature: -10° ~ +50° C
  6. Operating Humidity: 0~95% RH, no condensation
Vibration Sensor

Product introduction

The Aqara Vibration Sensor is embedded with a high precision acceleration sensor and it detects the vibration and movement of objects. It also works with other smart accessories to set various smart scenes, such as, local and remote alarm when it detects glass breaks.

It can detect falls, vibrations, inclinations and a stable position (~1 minute after no motion has been detected).

Note: This product is for indoor use only.

Quick Setup

  1. Insert the Gravio receiver in the USB port of your PC or Mac, then start the Gravio Edge Server.
  2. Remove the sensor's battery insulation seal.
  3. Start Gravio Studio on your PC, iPhone or iPad, tap to select Gravio Server which you just started, and create areas to describe where the Sensors are and layers to group them by function. Please select "Aqara-Vibration-Falling",  "Aqara-Vibration-Inclination" or  "Aqara-Vibration-Stable" from the layer selection list.
  4. Connect the Graivo receiver to this layer.
  5. From the Gravio Studio device list, tap the gravio Receiver line.
  6. If this sensor is the first to be connected sensor, press "Reset". (Please do not reset your receiver before adding subsequent sensors.)
  7. Next, press the "Pairing" button.
  8. When pairing is in progress, you will see a count-down. During that count-down, press the button on the sensor once.
  9. When the sensor connected to Gravio Studio screen is displayed, connection is completed.

Note: If the connection fails, please move the accessory closer to the Gravio Receiver and try again.

Installation

Option 1: Place it directly in the desired position.

Option 2 : Remove the protective film, and stick the wireless button to the desired position.

* Keep the surface clean and dry.

Specifications

  1. Model: DJT11LM
  2. Dimensions: 36 × 36 × 9 mm (1.42 × 1.42 × 0.35 in. )
  3. Wireless Protocol: Zigbee
  4. Battery: CR2032
  5. Operating Temperature: -10° ~ +50° C
  6. Operating Humidity: 0~95% RH, no condensation
Wireless Double Switch

Product introduction

Wireless Remote Switch (Double Rocker) is a remote control switch with low energy consumption and standard 86 type industrial design. Simply place or stick it almost anywhere to use. You can control Smart Wall Switch, Smart Plug and other smart accessories with single press, double press or long press of the Wireless Remote Switch.

Note: This product is for indoor use only.

Quick Setup

  1. Insert the Gravio receiver in the USB port of your PC or Mac, then start the Gravio Edge Server.
  2. Remove the sensor's battery insulation seal.
  3. Start Gravio Studio on your PC, iPhone or iPad, tap to select Gravio Server which you just started, and create areas to describe where the Sensors are and layers to group them by function. Please select "Aqara-WirelessSwitch" from the layer selection list.
  4. Connect the Graivo receiver to this layer.
  5. From the Gravio Studio device list, tap the gravio Receiver line.
  6. If this sensor is the first to be connected sensor, press "Reset". (Please do not reset your receiver before adding subsequent sensors.)
  7. Next, press the "Pairing" button.
  8. When pairing is in progress, you will see a count-down. During that count-down, press the button on the sensor once.
  9. When the sensor connected to Gravio Studio screen is displayed, connection is completed.

Note: If the connection fails, please move the accessory closer to the Gravio Receiver and try again.

Installation

Option 1: Place it directly in the desired position.

Option 2 : Remove the protective film, and stick the wireless button to the desired position.

* Keep the surface clean and dry.

Specifications

  1. Model: WXKG02LM
  2. Dimensions: 86 × 86 × 15.12 mm (3.39 × 3.39 × 0.60 in.)
  3. Wireless Protocol: Zigbee
  4. Battery: CR2032
  5. Operating Temperature: -5° ~ +50° C
  6. Operating Humidity: 5~95% RH, no condensation
Gravio CO2

Product introduction

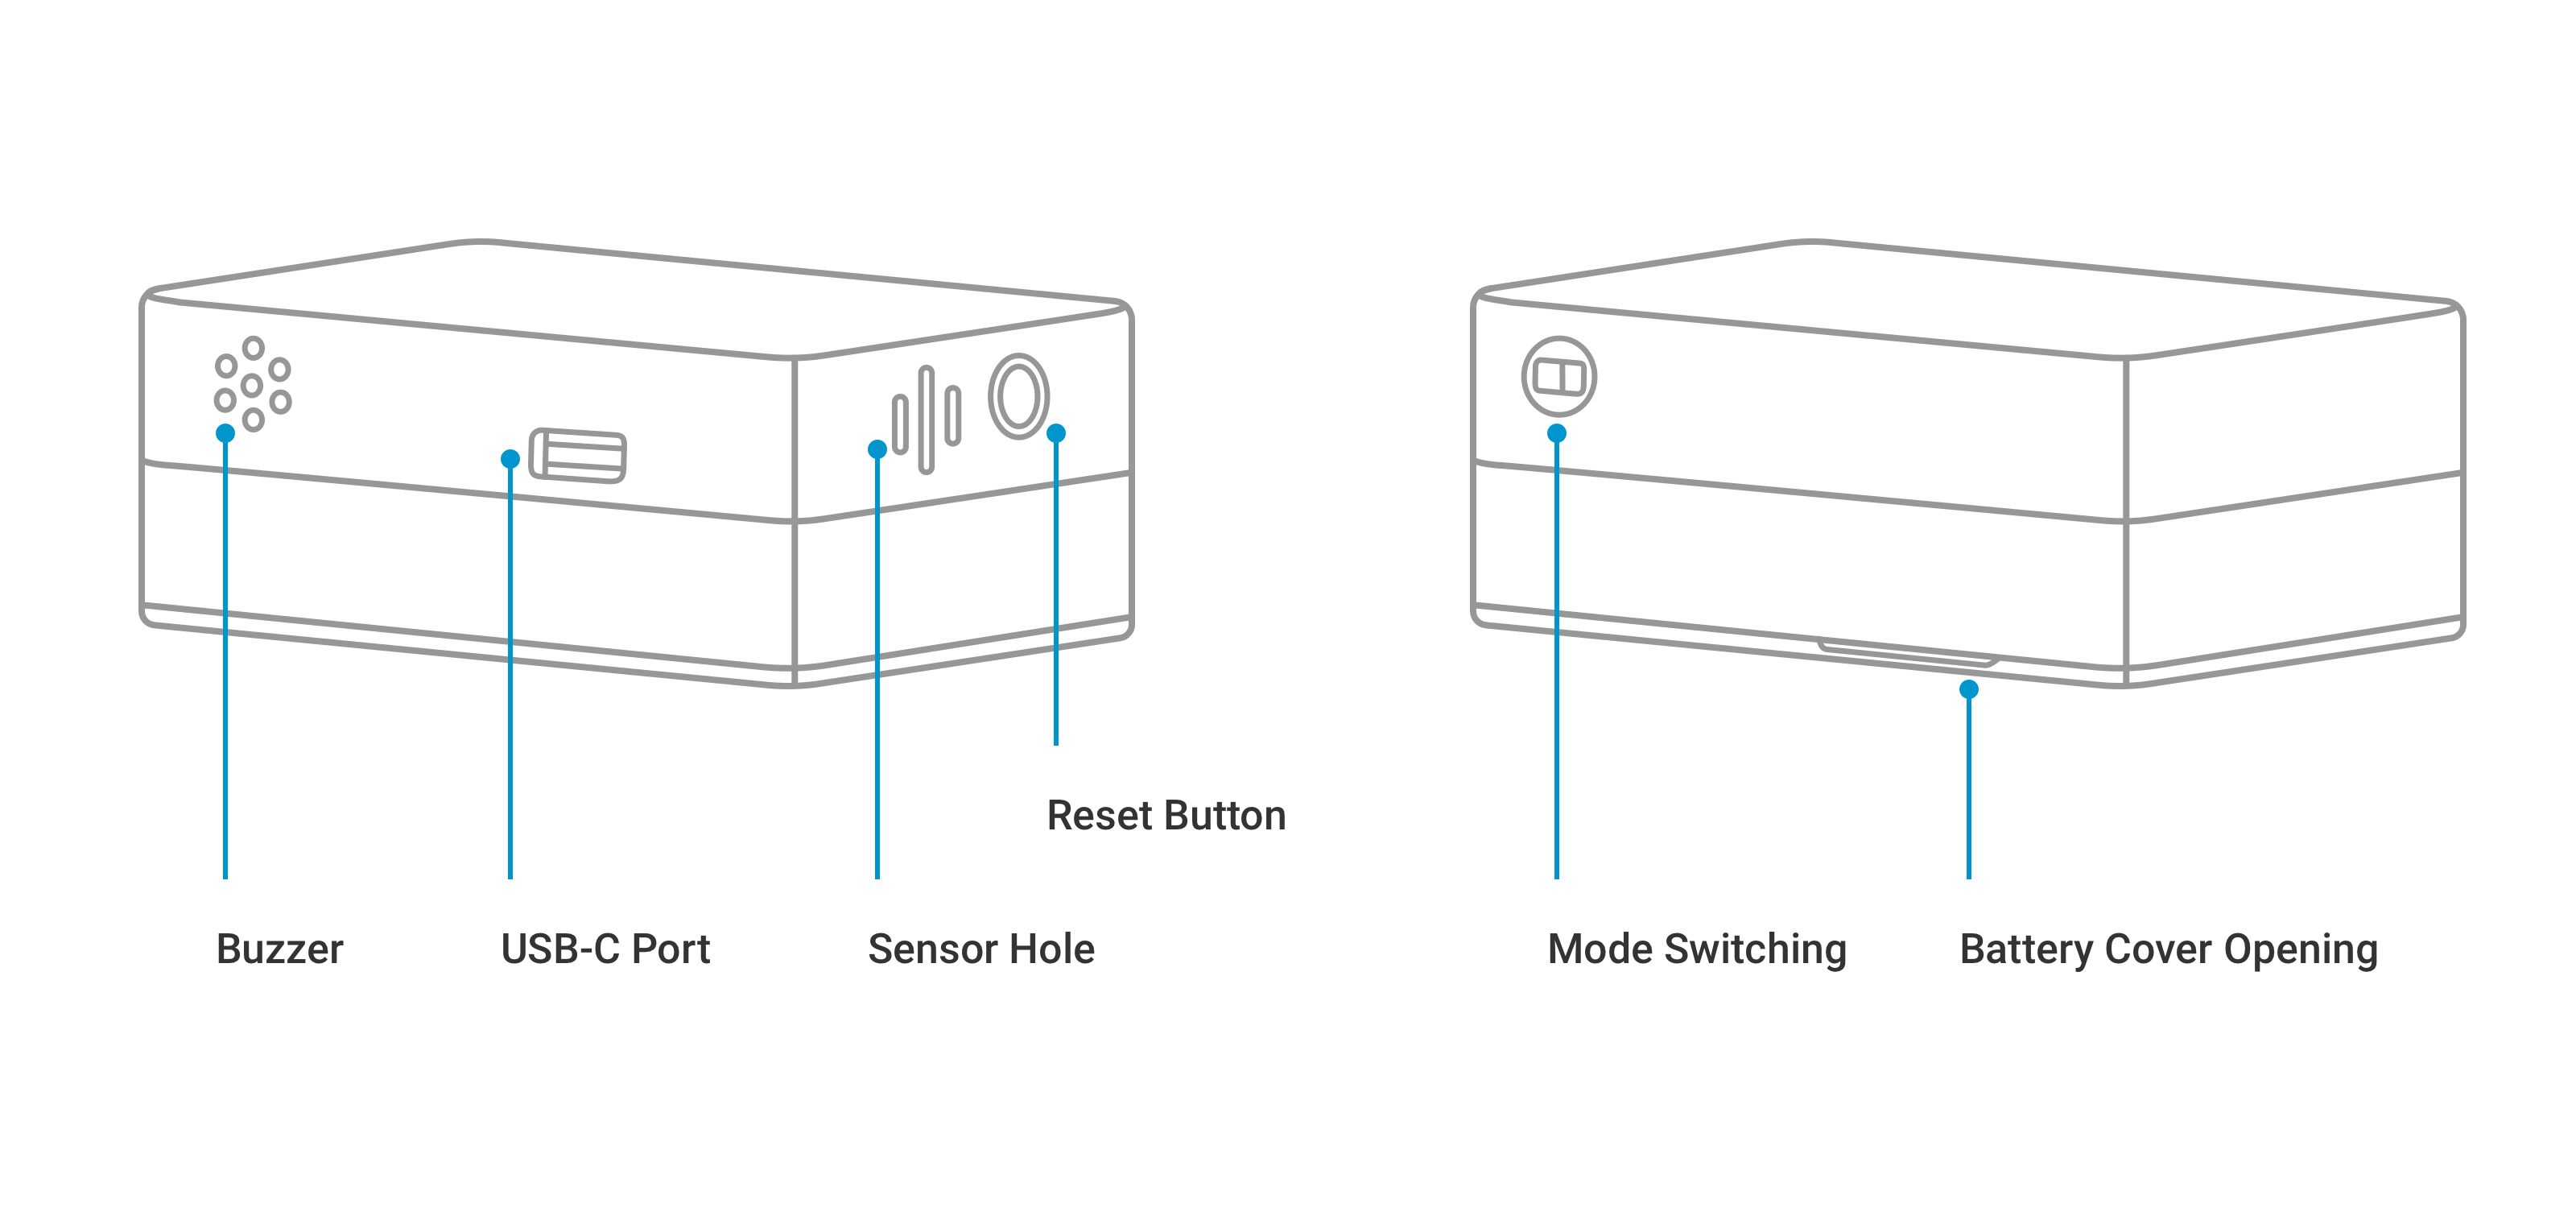
Gravio CO2 is an USB-C powered CO2 sensor that can report indoor CO2 measurements through a Zigbee connection.

Note: This product is for indoor use only.

Quick Setup

  1. Slide open the magnetic back panel and connect Gravio CO2 to power via USB-C.
  2. Insert the Gravio receiver in the USB port of your PC or Mac, then start the Gravio Edge Server.
  3. Start Gravio Studio on your PC, iPhone or iPad, tap to select Gravio Server which you just started.
  4. Click on the Devices icon in the top right.
  5. Select your Zigbee dongle (ensure that it has Firmware 0.9.3.0 or higher).
  6. Put the dongle in pairing mode.
  7. When pairing is in progress, you will see a count-down. During that count-down, hold the Gravio CO2 close to the USB dongle and long-press the button on the Sensor for 5 seconds.
  8. When the Gravio CO2 is connected, it will appear on the list of Zigbee devices.
  9. The Sensor is now ready to be used in the Gravio Actions.

Notes:

• If the connection fails, please move the accessory closer to the Gravio Receiver and try again.

• A short press triggers a network check. "Green" indicates the device has joined the network. "Red" means it's not connected to a network.

• Press the pairing button for 5 seconds for the device to enter pairing mode and hold it right next to the receiver device.

Installation

Remove the magnetic back panel and connect the USB-C cable for power.

Option 1: Place your Gravio CO2 directly in the desired position.

Option 2 : Remove the protective film, and stick the Gravio CO2 back panel to the desired position, so the Gravio CO2 can slide onto it.

* Keep the surface clean and dry.

Specifications

  1. Model: Gravio CO2
  2. Dimensions: 60 x 60 x 27 mm (2.4 x 2.4 x 1.1 in. )
  3. Wireless Protocol: Zigbee
  4. Power: USB-C (5V_1A)
  5. Operating Temperature: 0° ~ +50° C
  6. Operating Humidity: 0~85% RH, no condensation
  7. Measurement Range: 400 to 2,000 (ppm)
  8. Guaranteed Measurement Range:
    25 (°C) 101.3 (kPa) 400-2,000 (ppm) ±40 (ppm) ) ± 3 (%)
  9. Resolution: 1 (ppm)
Gravio Light

Product introduction

Gravio Light is an USB-C powered LED light that can change its colours through a Zigbee connection.

Note: This product is for indoor use only.

Quick Setup

  1. Slide open the magnetic back panel and connect Gravio Light to power via USB-C.
  2. Insert the Gravio receiver in the USB port of your PC or Mac, then start the Gravio Edge Server.
  3. Start Gravio Studio on your PC, iPhone or iPad, tap to select Gravio Server which you just started.
  4. Click on the Devices icon in the top right.
  5. Select your Zigbee dongle (ensure that it has Firmware 0802 or higher).
  6. Put the dongle in pairing mode.
  7. When pairing is in progress, you will see a count-down. During that count-down, hold the Gravio Light close to the USB dongle and long-press the button on the light for 5 seconds.
  8. When the light is now connected, it will appear on the list of Zigbee devices.
  9. The light is now ready to be used in the Gravio Actions.

Note: If the connection fails, please move the accessory closer to the Gravio Receiver and try again.

Installation

Remove the magnetic back panel and connect the USB-C cable for power.

Option 1: Place your Gravio Light directly in the desired position.

Option 2 : Remove the protective film, and stick the Gravio Light back panel to the desired position, so the Gravio Light can slide onto it.

* Keep the surface clean and dry.

Specifications

  1. Model: Gravio Light
  2. Dimensions: 60 x 60 x 27 mm (2.4 x 2.4 x 1.1 in. )
  3. Wireless Protocol: Zigbee
  4. Power: USB-C (5V_1A)
  5. Operating Temperature: -10° ~ +50° C
  6. Operating Humidity: 0~95% RH, no condensation
Gravio Distance

Product introduction

Gravio Distance is an USB-C powered Leaser distance sensor through Zigbee connection.

Note: This product is for indoor use only.

Quick Setup

  1. Slide open the magnetic back panel and connect Gravio Distance to power via USB-C.
  2. Insert the Gravio receiver in the USB port of your PC or Mac, then start the Gravio HubKit.
  3. Start Gravio Studio on your PC, tap to select Gravio HubKit which you just started.
  4. Click on the Devices icon in the top right.
  5. Select your Zigbee dongle (Please use latest Firmware).
  6. Put the dongle in pairing mode.
  7. When pairing is in progress, you will see a count-down. During that count-down, hold the Gravio Distance close to the USB dongle and long-press the button on the light for 5 seconds.
  8. When the Distance is now connected, it will appear on the list of Zigbee devices.
  9. The Distance is now ready to be used in the Gravio HubKit.

Note: If the connection fails, please move the accessory closer to the Gravio Receiver and try again.

Installation

Remove the magnetic back panel and connect the USB-C cable for power.

Option 1: Place your Gravio Distance directly in the desired position.

Option 2 : Remove the protective film, and stick the Gravio Distance back panel to the desired position, so the Gravio Distance can slide onto it.

* Keep the surface clean and dry.

Specifications

  1. Model: Gravio Distance
  2. Dimensions: 60 x 60 x 61 mm
  3. Weight: 92g
  4. Wireless Protocol: Zigbee
  5. Power: USB-C (5V_1A)
  6. Range: 0~30m
  7. Measurement accuracy: mm
  8. Tolerance: ±3mm
  9. Operating Temperature: -10° ~ +65° C
  10. Operating Humidity: 0~95% RH, no condensation
Gravio LED Matrix

Product introduction

Gravio LED Matrix is an USB-C powered 16x16 LED display through Zigbee connection.

Note: This product is for indoor use only.

Quick Setup

  1. Slide open the magnetic back panel and connect Gravio LED Matrix to power via USB-C.
  2. Insert the Gravio receiver in the USB port of your PC or Mac, then start the Gravio HubKit.
  3. Start Gravio Studio on your PC, tap to select Gravio HubKit which you just started.
  4. Click on the Devices icon in the top right.
  5. Select your Zigbee dongle (Please use latest Firmware).
  6. Put the dongle in pairing mode.
  7. When pairing is in progress, you will see a count-down. During that count-down, hold the Gravio LED Matrix close to the USB dongle and long-press the button on the light for 5 seconds.
  8. When the LED Matrix is now connected, it will appear on the list of Zigbee devices.
  9. The LED Matrix is now ready to be used in the Gravio HubKit.

Note: If the connection fails, please move the accessory closer to the Gravio Receiver and try again.

Installation

Remove the magnetic back panel and connect the USB-C cable for power.

Option 1: Place your Gravio LED Matrix directly in the desired position.

Option 2 : Remove the protective film, and stick the Gravio LED Matrix back panel to the desired position, so the Gravio Light can slide onto it.

* Keep the surface clean and dry.

Specifications

  1. Model: Gravio LED Matrix
  2. Dimensions: 100 x 100 x 24.5 mm
  3. Weight: 160g
  4. Wireless Protocol: Zigbee
  5. Power: USB-C (5V_1A)
  6. Operating Temperature: -10° ~ +65° C
  7. Operating Humidity: 0~95% RH, no condensation
Temperature Sensor

Specifications

  1. Model: GRTEMP-US-00005A
  2. Dimensions: 83 x 25 x 14 mm (3.2 x 0.9 x0.5 in)
  3. Frequency: 902.875Mhz
  4. Wireless Protocol: enOcean
  5. Battery: Solar energy
  6. Start-up time: typ. <2.5 min @ 400 lux, 25°C
  7. Operation time in darkness: 25°C min. 10 days, if energy storage fully
  8. Temperature sensor Measurement:
    range 0-40 °C, resolution 0.16 K; Accuracy typ. ±0.5 K between 17 °C and 27 °C
      typ. ±1 K between 0 °C and 40 °C
  9. Operating Temperature: -20 up to +60 °C
  10. Operating Humidity: 0% ~  93% r.h., non-condensing
  1. Model: GRTEMP-EN-00005A
  2. Dimensions: 83 x 25 x 14 mm (3.2 x 0.9 x0.5 in)
  3. Frequency: 868.3Mhz
  4. Wireless Protocol: enOcean
  5. Battery: Solar energy
  6. Start-up time: typ. <2.5 min @ 400 lux, 25°C
  7. Operation time in darkness: 25°C min. 10 days, if energy storage fully
  8. Temperature sensor Measurement:
    range 0-40 °C, resolution 0.16 K; Accuracy typ. ±0.5 K between 17 °C and 27 °C
      typ. ±1 K between 0 °C and 40 °C
  9. Operating Temperature: -20 up to +60 °C
  10. Operating Humidity: 0% ~  93% r.h., non-condensing
Door and Windows Sensor

Specifications

  1. Model: GRDOS-US-00090A
  2. Dimensions: 83 x 25 x 14 mm (3.2 x 0.9 x0.5 in); 44 x 9.2 x 8.3 mm (1.7 x 0.36 x 0.32 in)
  3. Frequency: 902.875Mhz
  4. Wireless Protocol: enOcean
  5. Battery: Solar energy
  6. Start-up time: typ. <2.5 min @ 400 lux, 25°C
  7. Operation time in darkness: 25°C min. 10 days, if energy storage fully
  8. Operating Temperature: -20 up to +60 °C
  9. Operating Humidity: 0% ~  93% r.h., non-condensing
  1. Model: GRDOS-EN-00090A
  2. Dimensions: 83 x 25 x 14 mm (3.2 x 0.9 x0.5 in); 44 x 9.2 x 8.3 mm (1.7 x 0.36 x 0.32 in)
  3. Frequency: 868.3Mhz
  4. Wireless Protocol: enOcean
  5. Battery: Solar energy
  6. Start-up time: typ. <2.5 min @ 400 lux, 25°C
  7. Operation time in darkness: 25°C min. 10 days, if energy storage fully
  8. Operating Temperature: -20 up to +60 °C
  9. Operating Humidity: 0% ~  93% r.h., non-condensing